A70 Supra Heater panel fix
This tutorial was taken from http://www.mkiiisupra.net/bbs/the-guide-s/39956-guide-resoldering-heater-control-panel.html for my own personal archive and to back-up important Supra
Related articles
If you find that your heaters occasionally blow cold air rather than hot and it comes and goes, it is probably due to bad joints on the printed circuit board (PCB) for the heater controls. This isn't too difficult to do but should ideally be performed in an ESD safe environment ... now that's over with you can all start soldering on the garage floor!
Step 1 - Start by removing the screw next to the handbrake lever

Step 2 - If you still have the screws behind your ash tray then remove them too!

Step 3 - If it is an auto, place the car in 2, if it is a manual then remove the gear knob and pull the gaiter away from the shaft

Step 4 - Ease the trim away starting next to the handbrake

Step 5 - Now move to the top of the centre trim and pull this away, it is simply clipped in place

Step 6 - Ensure the handbrake is up and then pull the trim over it. You will need to ease it over the steering wheel adjustment lever to get enough clearance to reach the wiring


Step 7 - Unplug the 3 connectors (hazards, rear demister and fog lights), each just has a tab you depress then pull

Step 8 - The final wire is behind the cigarette lighter, a 3 pin multiplug you just squeeze and pull clear

Step 9 - With the trim removed (you may have to unplug the stereo but I didn't), you have good visibility of the heater controls. Remove the 3 screws holding it in place and slide the unit out to access the wiring


Step 10 - Press the tabs and pull the two large multiplugs out the back of the unit and remove it from the car


Step 11 - Now it is time to disassemble the unit, pull the white plastic connector out of the socket as shown

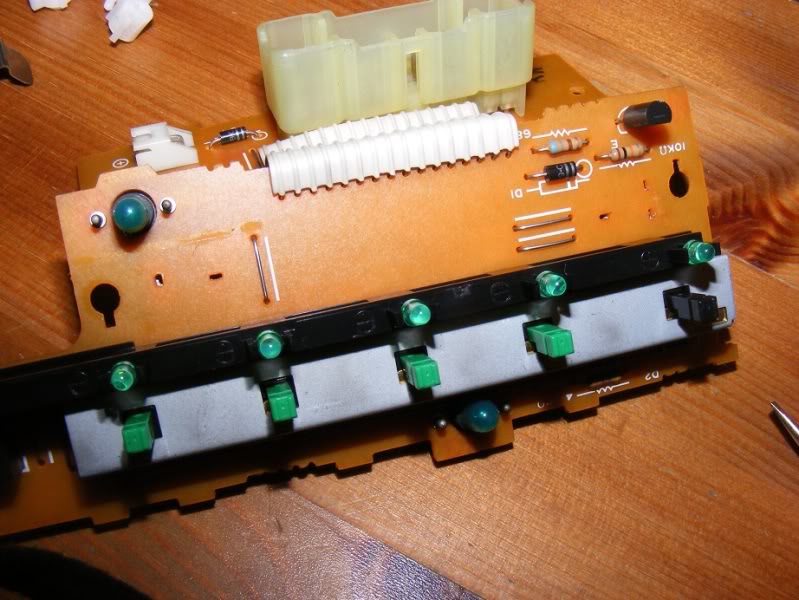
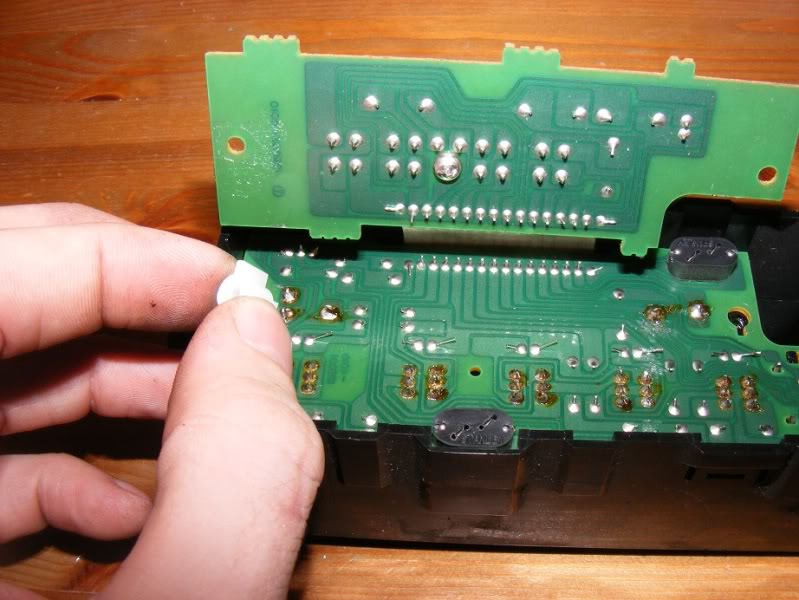
Step 12 - Remove the two Philips screws holding the multiplug daughterboard in place and ease it down as shown in the first picture then fold the ribbon cable out as shown in the second shot


Step 13 - You can now assess the state of the board, a bit of a cleanup was required for mine and the heater slider was erratic so I stripped it right down

Step 14 - There are two more Philips screws holding the PCB down, remove both as shown (note the small metal tab on the second screw)


Step 15 - Remove the 3 plastic stand offs for the secondary PCB


Step 16 - Remove all the buttons, these can be done by hand although you might want a screwdriver or similar to do the first one, they simply pull out

Step 17 - The surround for the fans holds the PCB in place so you need to remove the board from these slots as you pull it away. Apply pressure to the front sliders and ease the PCB out the back of the unit


Step 18 - There isn't really much to service in the rest of the enclosure so this can be placed to one side, be careful not to lose the slider control (see second picture) which will have detached on removal of the board


Step 19 - The heater slider can be a problem area so I decided to strip that down and clean it up

Step 20 - There are a number of solder joints holding the slider in place, I have highlighted on the first picture. Follow the leg through the board and then desolder the other side (solder braid or a solder sucker would help but failing that, melt the solder and then flick the board to get rid of it)


Step 21 - Once you have removed the solder from each joint, the slider should come away from the board quite easily, you may find a flatblade screwdriver between the pcb and slider helps as you melt any excess solder in the joints one at a time until it pops clear


Step 22 - Remove the slide and use a flatblade screwdriver or pliers to bend back all the tabs holding the metal can over the board then separate the two


Step 23 - Now clean up the contacts and the sliders (highlighted on the picture) thoroughly. You may have to apply a little force to the sprung contacts to ensure they are making a good connection

Step 24 - Once clean, refit the board to the can and bend the legs back down


Step 25 - Refit the slider to the PCB (it can only go one way round), use a screwdriver to help line up the legs with the holes to aid fitment


Step 26 - Resolder the legs down

Step 27 - Leave the slide in the fully cold position for refitment

Step 28 - Ensure all plastics are in the right place before we put the PCB back in the enclosure

Step 29 - Drop the slider control into the far left (cold) position on the fascia

Step 30 - Hold the control tab in place with one hand and insert the PCB with the other, give the tab a little wriggle to line it up with the slider


Step 31 - Clip all the buttons back in place


Step 32 - Refit the screw with the metal tab that holds the PCB down, then fit the second screw on the other side of the board


Step 33 - Now, with a fine tipped soldering iron, work around the board melting the old solder joints and reworking them with new solder. Make sure you get good joints that will last another 15-20 years before finishing off with some flux cleaner or similar

Step 34 - Refit the 3 pillars to space the secondary PCB


Step 35 - Fold the daughterboard back over the pillars

Step 36 - Plug the connector back in to join the fan speed controls to the board

Step 37 - Finally fit the 2 screws holding the top board in place

Step 38 - Now we head back to the car and plug it back in

Step 39 - Switch the ignition to 'ON' and then check your low speed fans are back. Run through all the buttons and make sure you still have everything working before assembling the dash again


Step 40 - Screw the control panel back to the dash

Step 41 - Plug the cigarette lighter, hazards, rear demister and fog lights back in as you refit the trim


Step 42 - Wriggle everything back into place and fit the screws you removed in step 1 and 2

